Green Home Improvements: Save Money and Energy

Making energy-efficient upgrades to your home may seem like a daunting task, but it can bring a plethora of benefits not only to the environment but also to your wallet. Energy-efficient improvements can reduce your carbon footprint and make your home more comfortable and cost-effective to run. With the world increasingly focused on sustainability, now is the perfect time to consider making some green upgrades to your living space.

One of the most effective ways to improve your home’s energy efficiency is through better insulation. Proper insulation can reduce heat loss during winter and keep your home cooler in the summer, decreasing the need for excessive heating or air conditioning. Modern insulation materials are often made from recycled content and are safe and non-toxic. By investing in good insulation, you’ll not only reduce your energy bills but also decrease your carbon emissions and create a more comfortable indoor environment.

Another important area to consider is your home’s lighting. Traditional incandescent bulbs are extremely inefficient compared to modern LED lighting. LED bulbs use up to 90% less energy and last up to 25 times longer. They also produce very little heat, reducing the burden on your air conditioning system. Making the switch to LED lighting is a quick and easy way to green your home and save money on both energy and replacement bulb costs.

Windows are another key area to focus on when greening your home. Old, single-pane windows can be responsible for significant heat loss and gain, affecting your energy bills and comfort. Upgrading to double or triple-glazed windows can make a huge difference in your home’s energy efficiency and reduce outside noise. Modern windows are often coated with low-emissivity (low-E) materials that help keep heat inside during winter and reflect it away during summer, further improving efficiency.

In addition to these upgrades, there are numerous smaller changes you can make that have a big collective impact. For example, install a smart thermostat to better control your heating and cooling and take advantage of programmable timers and remote access. Upgrade to energy-efficient appliances, such as refrigerators, washing machines, and dishwashers, which use less water and electricity. Even smaller changes, like installing low-flow showerheads and faucet aerators, can significantly reduce water usage without affecting performance.

By embracing these green home improvements, you can reduce your environmental impact and create a more comfortable and efficient living space. Many of these upgrades come with financial incentives, such as rebates and tax credits, and they will also add value to your home. Being kind to the planet doesn’t have to cost the Earth, and with these simple changes, you can start saving money and reducing your carbon footprint today.

Remember, every small change contributes to a greener future. So, whether you’re renovating your entire home or just making a few upgrades, consider choosing energy-efficient options wherever possible. Together, we can create a more sustainable world, one step at a time. By sharing these ideas and inspiring others to follow suit, we can make a positive impact on the planet and future generations.
Upcycled Furniture: Give Old Pieces New Life

Giving New Life to Old Furniture: The Magic of Upcycling

There’s something special about taking an old piece of furniture and giving it a new lease of life. Upcycling, the process of transforming waste materials or unwanted products into something usable, is a trend that has taken the interior design world by storm. And it’s easy to see why. Not only does upcycling give new purpose to old items, but it also reduces waste, promotes sustainability, and fosters a sense of creativity and individuality in our homes.

The beauty of upcycled furniture is that it combines the charm of vintage pieces with a modern twist. Whether it’s a dusty old chest of drawers from your grandparents’ attic or a discarded table from a thrift store, each piece has a story to tell. And with a bit of imagination and elbow grease, you can create something truly unique that reflects your personal style.

One of the most appealing aspects of upcycling is the opportunity to embrace individuality. In a world where mass-produced furniture is readily available, owning a one-of-a-kind piece that you’ve crafted yourself is incredibly satisfying. It’s a chance to showcase your personal flair and create a space that truly feels like your own. Upcycling also allows you to be resourceful and give new life to items that might otherwise end up in landfills.

The process of upcycling itself can be a rewarding journey. It often involves learning new skills, from simple sanding and painting techniques to more advanced refurbishing methods. For many, it becomes a hobby that encourages creativity and provides a sense of accomplishment. There are endless possibilities when it comes to upcycling, and it’s a wonderful way to express your style while being environmentally conscious.

Social media platforms and online communities have also played a significant role in the rise of upcycling. They provide a space for people to share their creations, exchange ideas, and seek inspiration. A simple scroll through Instagram or Pinterest reveals a wealth of upcycled furniture transformations, from stunning dresser makeovers to creative ways to reuse old wooden crates. These online platforms have helped fuel the upcycling trend and inspired countless individuals to give DIY a try.

Whether you’re an experienced DIY enthusiast or a beginner looking for a new hobby, upcycling furniture offers countless benefits. It’s a chance to be creative, environmentally conscious, and unique all at once. So, the next time you’re considering buying new furniture, why not explore the potential of upcycling instead? You might just find yourself falling in love with the process and discovering a hidden talent you never knew you had.

Remember, upcycling is not just about giving old furniture a new look; it’s about embracing sustainability, expressing your individuality, and creating something truly special that will be cherished for years to come. So, get ready to roll up your sleeves, unleash your creativity, and give those forgotten pieces a new lease of life!

DIY Home Security: Simple Ways to Protect Your Home

As a homeowner, one of your top priorities should be keeping your home safe and secure. While there are many sophisticated home security systems on the market, they can be costly and complex to install. Fortunately, there are several simple and affordable do-it-yourself (DIY) measures you can take to significantly improve your home’s security.

The first line of defense against intruders is your home’s exterior. Ensure all doors, including the garage door, are made of solid wood or metal and are secured with heavy-duty deadbolt locks. Windows should be reinforced with strong latches or security glazing, and consider adding security film to prevent smash-and-grab burglaries. Motion-activated floodlights around the perimeter of your home can deter potential intruders, as no burglar wants to be spotlighted during a break-in.

Surveillance cameras have become increasingly affordable and easy to install. Place cameras strategically around your property, focusing on potential entry points such as doors and first-floor windows. Look for cameras with motion detection and night vision capabilities, and consider subscribing to a cloud storage service to save footage for future reference.

Another layer of protection is a security alarm system. Modern DIY wireless systems are easy to install and can be customized to fit your needs. Place sensors on doors and windows, and consider using glass break detectors and motion sensors for added security. You can choose to monitor the system yourself or pay a small fee to have a professional monitoring service respond to any alerts.

Don’t forget to secure your home’s wireless network. A common mistake is to leave your Wi-Fi router unsecured or use the default password. Change the administrator password and update the SSID name to something unique. Enable WPA2 encryption and regularly update your router’s firmware to ensure your network remains secure.

Simple preventative measures can also deter burglars. Ensure valuable items like laptops and jewelry are out of sight and consider etching your driver’s license number on electronics to identify them if they’re stolen. Maintain your yard to reduce potential hiding spots, and get to know your neighbors so they can keep an eye on your home when you’re away.

When going on vacation, take steps to make your home look occupied. Use smart light bulbs that can be controlled remotely or set to a timer, and ask a neighbor to pick up your mail and newspapers. Avoid broadcasting your travel plans on social media, as this can tip off potential thieves.

Finally, invest in a safe to secure your most valuable possessions and important documents. Bolt the safe to the floor or wall, making it difficult for thieves to remove. Remember, a safe is only as good as its hiding place, so be discreet. By implementing these simple DIY home security measures, you can significantly improve the protection of your home and deter potential intruders.

Budget-Friendly Kitchen Makeover: 10 Ideas Under $100

Kitchen makeovers can be expensive, but they don’t have to break the bank. If you’re looking to refresh your kitchen without spending a fortune, there are plenty of budget-friendly options to choose from. Here are ten great ideas, all under $100, to give your kitchen a brand-new look without draining your wallet.

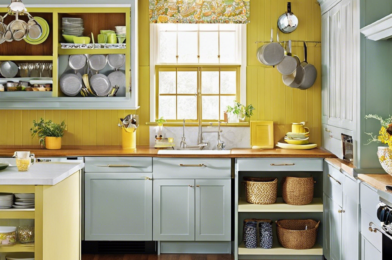
A fresh coat of paint can work wonders for your kitchen. Consider repainting your cabinets or even just the walls. Opt for a color that complements your existing décor and gives the space a quick and inexpensive facelift. If you have a little more wiggle room in your budget, you can also replace outdated hardware, such as cabinet knobs and pulls, for a more modern look. This small change can make a significant visual impact without costing a fortune.

Updating your backsplash is another excellent way to give your kitchen a stylish upgrade. There are many affordable options available, such as peel-and-stick tiles or even painting over your existing backsplash with a high-quality paint designed for kitchens and bathrooms. This easy upgrade can quickly transform the look and feel of your cooking space.

Maximizing storage is crucial in the kitchen, and there are budget-friendly ways to achieve this. Install open shelves to display your dishes and cookware, adding a stylish and modern touch to your walls. You can also utilize unused spaces, such as the back of cabinet doors, to hang lightweight items like measuring cups or cleaning supplies.

Instead of buying new cabinets, give them a quick update with new doors or a fresh finish. Cabinet refacing is a cost-effective solution, offering a variety of styles and colors to choose from without the hefty price tag of a complete replacement. It’s a quick way to give your kitchen a whole new look in just a few days.

Under-cabinet lighting is an affordable way to brighten your kitchen and create a warm ambiance. LED light strips are easy to install and can be found at most home improvement stores for under $50. This simple addition can make your kitchen feel more inviting and sophisticated.

Give your kitchen sink a quick upgrade by swapping out the faucet. A new faucet not only improves the functionality of your sink but also adds a stylish touch. You can find various designs and finishes to match your existing fixtures, all within a $100 budget.

Bring the outdoors in by adding fresh herbs and small plants to your kitchen décor. Potted herbs are an affordable and attractive way to add color and life to your countertops or windowsill. They are also handy when cooking, providing fresh ingredients for your favorite recipes.

A new kitchen rug or runner can tie the whole room together, adding a pop of color or a stylish pattern to your floor. Opt for washable rugs to make cleaning spills and messes a breeze. This simple addition can truly pull the entire space together and make your kitchen feel refreshed and renewed.

Painting Like a Pro: Tips and Tricks for Perfect Walls

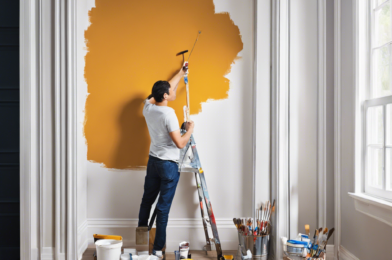
Preparing to paint your walls can be a daunting task, but with the right tools, techniques, and mindset, you can achieve professional-looking results. Painting your walls is an inexpensive and effective way to transform any room and even increase the value of your home. A fresh coat of paint can brighten up a space, cover up scuffs and marks, and even allow you to express your personal style. To ensure your project runs smoothly and delivers the finish you desire, here are some tips and tricks to help you paint like a pro and achieve perfect walls.

First, assess the condition of your walls. Are they dirty or dusty? Give them a good clean to ensure the paint will adhere properly. Repair any holes, cracks, or imperfections with filler and sand them smooth. A smooth wall will ensure your paint job looks seamless. Next, protect your floors and furniture. Painting can get messy, so it’s important to cover your floors with drop cloths and move or cover any furniture in the room. Use painter’s tape to protect trim, baseboards, and ceilings from paint drips and spills. Take the time to do this step properly; it will save you a lot of cleanup afterward!

Choosing the right paint is crucial. Opt for a high-quality paint that is specifically designed for walls. Consider the finish you want to achieve. A flat or matte finish will help hide imperfections, while a satin or semi-gloss finish will give you a more durable and wipeable surface. Don’t skimp on paintbrushes and rollers; investing in good-quality tools will make your job easier and give you better results.

Before you dip your roller into the paint, take some time to plan your painting strategy. Start with the edges of the room first. Use a small paintbrush to carefully cut in along the edges of the walls, as well as any corners or tight spaces. This will ensure a neat finish and help you avoid getting paint on unwanted areas. Once the edges are done, it’s time to roll. Start at the top of the wall and work your way down, using long, even strokes. Roll in different directions to ensure even coverage. It’s usually best to apply two thin coats of paint, allowing adequate drying time in between, rather than one thick coat.

Painting like a pro is all about preparation, using the right tools, and taking your time. Don’t rush the process, and you’ll be rewarded with perfect walls that you can proudly show off. Happy painting!

Remember to take breaks when painting, especially if you’re tackling a large room or an entire house. Pace yourself, and ensure you have adequate ventilation. Painting can be a great DIY project, but if you feel overwhelmed or the job is too big, don’t hesitate to call in professional painters who can provide expert results.

Lastly, step back and admire your handiwork! Enjoy the transformation of your space and the sense of accomplishment that comes with painting your walls like a pro. It’s a rewarding project that truly revitalizes your home, and with these tips, you can ensure a smooth and satisfying process from start to finish. Happy painting, and may your walls turn out perfectly!

Fix It Yourself: Common Plumbing Issues You Can Solve

We’ve all been there: a leaky faucet that won’t stop dripping or a clogged drain that refuses to budge. While plumbing issues can be a nuisance, many common problems can be solved with a few simple tools and a bit of elbow grease. So roll up your sleeves and get ready to channel your inner handy person!

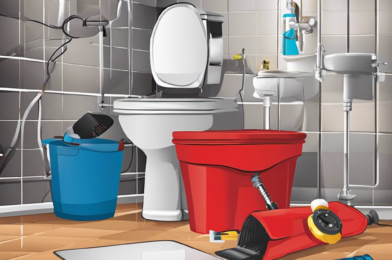
One of the most frequent plumbing issues is a clogged sink or shower drain. This can often be fixed with a plunger or a drain snake, which you can purchase at any hardware store. For more serious clogs, you may need to remove the trap—the curved portion of the pipe under the sink—to clear the blockage. Don’t forget to place a bucket underneath before removing the trap to catch any water or debris!

Leaky faucets are not only annoying, but they can also drive up your water bill. Fortunately, fixing a leaky faucet is usually a straightforward job. The first step is to identify the type of faucet you have—whether it’s a compression, cartridge, ball, or ceramic disc faucet—and then purchase the appropriate replacement parts. Once you have the necessary tools and parts, you can follow online tutorials or consult a handy how-to guide to walk you through the repair process step-by-step.

Another common issue is a running toilet, which can waste a significant amount of water. Usually, this issue can be resolved by replacing the flapper valve or adjusting the float height. The flapper valve is located inside the tank and controls the flow of water, while the float adjusts the water level. Both of these components are essential in ensuring your toilet functions properly and efficiently.

Low water pressure in your shower or sink can leave you standing under a trickle of water instead of enjoying a refreshing stream. This issue could be caused by a clogged showerhead or faucet aerator, which can be fixed by removing and cleaning them. If that doesn’t do the trick, the problem may lie with the shut-off valves, which might be partially closed or blocked by gunk or mineral deposits. It’s worth checking these valves, as they could be the culprits restricting the flow of water to your fixtures.

Some plumbing repairs can be prevented with proper maintenance. For example, regularly cleaning your showerhead and faucet aerators can help prevent clogs and maintain good water pressure. Similarly, maintaining your water heater by flushing it out annually can help prevent sediment buildup and extend its lifespan. By being proactive with maintenance, you can save yourself time and money in the long run.

When tackling plumbing projects, it’s important to know your limits and seek professional help when needed. Some jobs, such as installing new pipes or addressing complex drainage issues, are better left to licensed plumbers. They have the expertise and equipment to handle more involved repairs safely and effectively. While it may be tempting to attempt a DIY solution for every plumbing problem, recognizing when to call in reinforcements is essential to avoid making the issue worse or causing further damage.

Whether you’re a homeowner or a renter, taking on basic plumbing repairs can be empowering and cost-effective. With a bit of knowledge, the right tools, and a can-do attitude, you’ll be well on your way to tackling common plumbing issues and saving yourself the expense of calling a plumber for every little drip and clog. So, the next time you encounter a plumbing problem, roll up your sleeves, grab your toolbox, and get ready to fix it yourself!

5 Easy DIY Projects to Boost Your Home’s Value

Whether you’re looking to sell your home or simply want to improve its value, there are several easy DIY projects you can take on that will make a big impact. Boosting your home’s value doesn’t have to involve costly renovations or hiring contractors. With a few simple upgrades and some elbow grease, you can significantly increase your property’s worth and make it more appealing to potential buyers. Here are five DIY projects that are sure to pay off:

A fresh coat of paint can work wonders for your home’s interior and exterior. Opt for neutral colors to appeal to a wide range of buyers and create a sense of spaciousness. Painting is a cost-effective way to update your space and can be easily done over a weekend. Don’t forget to paint the trim and doors for a truly polished look. Power washing the exterior before painting will ensure the new paint job looks professional and lasts longer.

Revamping your kitchen doesn’t have to break the bank. Instead of replacing cabinets, consider painting them a modern color or simply refreshing the existing paint. Update hardware such as cabinet pulls and knobs, and add new faucets and appliances to give the space a more luxurious feel. These simple changes can bring new life to your kitchen and significantly increase the value of your home.

Bathrooms are a key area of focus for potential buyers, so making some upgrades can really pay off. You can start by replacing the toilet seats and showerheads and then move on to installing new vanities and retiling the shower or bath area. You can also make the space feel more luxurious by adding features such as heated towel racks or a bidet.

First impressions matter, so enhance your home’s curb appeal with some simple landscaping. Trim hedges and trees, and add colorful flowers or shrubs to your front yard. Power wash the exterior of your house, and consider adding some outdoor lighting to showcase your home’s best features. You could also think about installing a new mailbox and house numbers to give your home’s exterior a stylish update.

Hardwood floors are a coveted feature in any home, and refinishing them can instantly make your space feel brand new. Sand down the existing floors and apply a fresh coat of stain and sealant to bring back their natural beauty. If you have carpeted areas, consider pulling up the carpet to expose and refinish any hardwood floors that may be hidden underneath. This can make your home feel larger and more modern.

These projects are sure to boost your home’s value and make it more attractive to potential buyers. You don’t need to spend a fortune to make significant improvements to your property. With some time and effort, you can easily increase your home’s worth and enjoy the benefits of your hard work.

Remember, when taking on any DIY project, always prioritize safety and follow instructions carefully. If you’re unsure about a project, don’t be afraid to seek guidance from a professional or enlist the help of a handy friend. Good luck, and happy improving!