Beginner’s Guide to Power Tools: What You Need and How to Use Them

The world of power tools can be daunting for beginners, with its seemingly endless array of gadgets and gizmos, each promising to make your life easier. But fear not! With the right guidance, you can navigate this world with confidence and soon be wielding these tools like a pro. Power tools are a worthwhile investment for any DIY enthusiast or aspiring tradesperson. They make tasks quicker, easier, and often produce more precise results than manual labor.

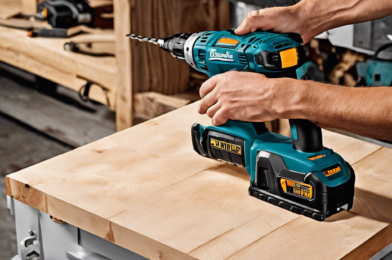
So, where to begin? Firstly, assess your needs. Consider the scope of projects you plan to tackle. Are you looking to renovate your entire home, build furniture from scratch, or simply hang the odd picture frame? Understanding the requirements of your projects will help you determine the necessary tools. A drill is a staple in any power tool collection and will likely be your most used. From hanging curtains to assembling furniture, a drill is versatile and efficient. You’ll also want a variety of drill bits to accommodate different screw sizes and materials.

Next, you should consider acquiring a power saw. While a hand saw is useful, a power saw offers speed and precision. There are numerous types available, from circular saws for cutting wood, to jigsaws that can handle a variety of materials and are ideal for curved cuts. If you’re planning on taking on larger projects, a reciprocating saw is a must-have. These powerful tools can cut through just about anything.

Another essential is the humble sander. Whether you’re refinishing an old piece of furniture or preparing walls for painting, a sander will save you time and elbow grease. Go for a random orbital sander, as it can handle a variety of sanding tasks and is easy to control. For woodworking, a router is invaluable. It allows you to create decorative edges, grooves, and joints with precision.

It’s important to prioritize safety when using power tools. Always wear protective gear, including goggles, ear protection, and gloves. Educate yourself on how to use each tool properly and follow all manufacturer instructions.

Power tools can be purchased from hardware stores and online retailers. It’s worth investing in well-known brands, as they often offer better performance and durability. Look out for sales and bundles, as you can often get a good deal on a set of tools. Lastly, don’t forget to budget for tool accessories and consumables, such as sandpaper and drill bits, which are just as essential to getting your projects done right.

Now that you’ve got a handle on the basics, you’re well on your way to becoming a power tool pro. Happy crafting!

Home Office Makeover: Create a Productive Space at Home

Working from home has become the new normal for many professionals, and creating a dedicated and productive space is key to staying focused and efficient. Here are some tips to transform your home office into an inspiring and functional workspace.

Firstly, choose a quiet and secluded area in your home that allows for privacy and minimal distractions. Soundproof the room if necessary to create a calm and peaceful environment. Ensure your office has ample natural light, which boosts mood and productivity. Consider a room with a view to provide visual breaks and a sense of openness. Invest in ergonomic furniture; a good chair and desk are essential to support your posture and comfort throughout the day. Adjustable and customizable furniture can ensure your workspace is tailored to your needs.

Keep your space organized with efficient storage solutions. Use shelves, cabinets, and drawers to store supplies and minimize clutter. A tidy space helps improve focus and creates a more inviting atmosphere. Personalize your office with decor that reflects your taste and inspires you. Add artwork, plants, or family photos to make the space your own. This helps to boost creativity and make your workspace a pleasant place to be.

Technology is an important aspect of a modern home office. Ensure your space has the necessary outlets and charging stations for your devices. Invest in good-quality headphones to block out noise and enhance your virtual meetings and calls. Also, consider a standing desk or a convertible sitting/standing desk setup to add flexibility to your work posture throughout the day. This can help improve your energy levels, focus, and overall health, especially if you work long hours.

Color psychology suggests that certain colors can impact our mood and productivity. Paint your walls or add accents in colors that encourage focus and creativity, such as shades of blue or green. Warmer tones like yellow can stimulate happiness and energy. Ensure your lighting is adaptable to your needs and the time of day. Aside from natural light, add task lighting for your desk and ambient lighting to set the mood and avoid eye strain.

Implementing these tips will help you create a productive and inviting home office that encourages you to do your best work every day. Remember, your workspace should be tailored to your unique needs and preferences, so customize it in a way that inspires and motivates you.

DIY Pest Control: Natural Ways to Keep Bugs Out

Keeping your home pest-free can be a challenging task, especially during the warmer months when bugs and insects are more active. Many people reach for chemical pesticides to solve the problem, but these can often be harmful to both your health and the environment. So, what are some natural, DIY pest control methods that are effective and safe?

First and foremost, prevention is key. Keeping a clean and tidy home is the best way to deter pests from taking up residence. Vacuum and sweep regularly, don’t leave dirty dishes in the sink, and store food in airtight containers. Ensure that any gaps or cracks in walls, windows, and doors are sealed, as these can provide easy entry points for unwanted guests.

There are also several natural repellents that can be used to keep bugs at bay. For example, peppermint oil is a great deterrent for spiders and ants. Simply mix a few drops of the oil with water in a spray bottle and spritz it around your home, paying particular attention to entry points and areas where bugs tend to gather. Similarly, citronella oil is effective against mosquitoes, while lavender oil can help repel flies and fleas.

Another natural pest control method is to introduce beneficial insects into your home or garden. Ladybugs, for instance, are a great way to control aphids and other small insects. Nematodes are also beneficial as they feed on a variety of pests, including grubs and beetles. You can purchase these helpful creatures online or at garden centers and simply release them in your garden or problem areas.

Traps are another useful tool in your DIY pest control arsenal. There are many different types of traps available, from sticky traps that capture crawling insects like roaches and silverfish, to bait traps that use pheromones to attract and capture specific types of pests. For example, fruit fly traps can be easily made at home by filling a jar with a mixture of apple cider vinegar and dish soap, which lures the flies in and traps them.

In addition to these methods, there are also a number of natural pest repellents that can be ingested or applied topically to keep bugs away from you personally. For example, eating garlic or taking a garlic supplement is said to repel mosquitoes, while applying a mixture of vinegar and water to your skin can help keep biting insects at bay.

Remember, when it comes to DIY pest control, a combination of these natural methods is often most effective. By being proactive and consistent in your efforts, you can enjoy a pest-free home without resorting to harmful chemicals. It’s also important to be patient and persistent, as some of these methods may take a little more time and effort but will ultimately be safer and more rewarding.

If you’re unsure about any of these methods or have a severe pest infestation, it’s always best to consult with a professional pest control company that can provide guidance and advice tailored to your specific situation. They can help identify the pests and recommend the most appropriate and effective solutions, ensuring your home is protected and your pest problems are a thing of the past.

Wood Working for Beginners: 5 Easy Projects to Start With

Woodworking is an ancient and rewarding hobby that can be accessible to everyone, not just those with years of experience or expensive tools. With just a few basic techniques and some beginner-friendly projects, you can create beautiful and functional pieces for your home or to give as gifts. So, if you’re just starting out, here are five simple projects to get you comfortable with the basics and help you build up your skills.

First up is a classic: the birdhouse. This is a great introductory project as it requires only basic tools and skills, such as measuring, cutting, and drilling. You can find simple plans online or create your own design, and soon you’ll have a functional and attractive birdhouse to hang in your yard. Not only is it a fun and easy project, but it’s also a great way to attract wildlife and bring a bit of nature into your outdoor space.

Another simple project perfect for beginners is a set of wooden coasters. These can be made with minimal tools and materials and offer a lot of room for creativity. You can experiment with different types of wood, add personalized engravings or burn designs, or even incorporate resin for a unique and modern touch. Coasters are also a great way to practice your sanding and finishing techniques, which are essential skills for any woodworker.

A step-up stool is a practical and useful project that can be completed with just a few basic pieces of wood and some simple joinery techniques. This project will give you a chance to practice your measuring and cutting skills, as well as introduce you to the basics of joinery, which is the art of joining pieces of wood together. Once completed, you’ll have a functional step stool that can be used in the kitchen, garage, or anywhere else a little extra height is needed.

Creating a wooden bowl is an excellent way to explore the art of woodturning. Woodturning is a specific subset of woodworking that involves using a lathe to shape wood. While it may seem intimidating at first, basic woodturning techniques are quite accessible, and you can create a stunning wooden bowl with just a few simple steps. This project will introduce you to the fundamentals of woodturning, including mounting the wood, using the lathe tools, and applying finishes.

Lastly, a picture frame is a fantastic beginner project as it combines basic woodworking skills with the opportunity to add your own creative flare. You can practice your measuring, cutting, and joining skills to assemble the frame, and then get creative with paints, stains, or other decorative touches to make it unique. It’s a simple yet impactful project that will leave you with a sense of accomplishment and a beautiful piece to display your favorite memories.

So, there you have it—five fantastic projects to get you started on your woodworking journey. Remember to take your time, practice safety precautions, and, most importantly, have fun as you create and learn. With these projects under your belt, you’ll be well on your way to becoming a skilled woodworker, capable of tackling more complex and challenging projects. Happy crafting!

This article provides a comprehensive guide for beginners, covering a range of simple and enjoyable projects that will help newcomers develop fundamental woodworking skills and gain confidence in their abilities. By starting with these basic projects, anyone can discover the joy and satisfaction of working with wood and gradually build their expertise to take on more advanced challenges.

Smart Home on a Budget: DIY Tech Upgrades

The idea of transforming your home into a smart home can be exciting, but it often seems like an expensive endeavor. With the right approach and some DIY skills, it is possible to create a smart home on a budget. You don’t have to break the bank to enjoy the convenience and efficiency of connected devices. Here are some tips and tricks to get you started:

The first step to creating a smart home on a budget is to assess your needs and priorities. Decide which areas of your home you want to automate and what functions are most important to you. Perhaps you want to control your lighting and appliances remotely, improve your home security, or set up a robust entertainment system. Prioritizing your needs will help you allocate your funds effectively. Look for sales and discounts on smart home devices and hubs. Many popular brands, such as Amazon and Google, frequently offer deals on their smart speakers and displays, which can act as a central control system for your smart home devices. You can also explore lesser-known brands that offer more affordable alternatives to popular smart home devices. Just be sure to read reviews and compare specifications to ensure you’re getting a quality product.

Another cost-effective way to build your smart home is to opt for DIY installations wherever possible. Many smart home devices are now designed for easy installation and setup, so you don’t need to hire a professional. From smart locks and thermostats to security cameras and smart blinds, there are a multitude of devices you can install yourself, saving you money on installation fees. You can also explore integration options to get the most out of your devices and create a seamless smart home experience.

Remember, creating your smart home doesn’t have to happen overnight. Take your time, research the best options for your needs, and gradually add devices as your budget allows. By being selective, practical, and a little handy, you can create a smart home that enhances your daily life without breaking the bank. So start planning, keep an eye out for deals, and get ready to enjoy the convenience and wonders of smart home technology.

To enhance your smart home experience, don’t forget to explore the wide range of free and low-cost apps available. These can add functionality and convenience to your setup. For example, IFTTT (If This Then That) is a free service that lets you create custom applets to automate tasks across various devices and services. You can also use voice assistants like Amazon Alexa or Google Assistant to control your smart devices with voice commands, creating a more intuitive and efficient smart home ecosystem.

Lastly, while creating a smart home on a budget, it is essential to be mindful of potential hidden costs and ongoing expenses. Some smart devices may require a subscription to unlock their full potential or to access advanced features. Be sure to factor in these recurring costs when planning your budget. Additionally, consider the long-term savings that certain smart devices can offer. For example, smart thermostats can help reduce your energy bills by optimizing heating and cooling, while smart light bulbs can lead to lower electricity costs. So, while there may be initial costs to consider, the right smart devices can pay for themselves over time.

Bathroom Refresh: 7 DIY Ideas to Try This Weekend

Refreshing your bathroom doesn’t have to be a costly or time-consuming endeavor. With a little creativity and some elbow grease, you can easily transform your space over a weekend. Whether you’re looking for a quick update or a complete makeover, here are seven DIY ideas to try that will give your bathroom a whole new look and feel.

First, consider giving your walls a fresh coat of paint. Opt for a relaxing shade of blue or green to create a spa-like atmosphere. If you’re feeling adventurous, try adding an accent wall with wallpaper or a bold paint color. This will instantly elevate the space and give it a stylish update. You can also try removable wallpaper, which is perfect for renters or those who like to change up their decor frequently.

Next, update your bathroom’s hardware for a quick and easy refresh. Change out the drawer pulls and cabinet knobs for something more modern or unique. You can also swap out your faucet and showerhead for more sleek and stylish models. These small changes can make a big impact and won’t break the bank. While you’re at it, trade your old light fixtures for something more modern.

Bring nature into your bathroom with houseplants. Add a touch of green and improve air quality by placing plants like aloe, snake plants, or peace lilies in your space. These plants thrive in humid environments and can easily be cared for with minimal effort, making them the perfect bathroom companions.

Another simple way to refresh your bathroom is to replace your shower curtain and towels. Opt for a fun and colorful pattern or a more sophisticated solid color to give your bathroom a whole new look. You can also try adding a new rug to complement your updated color scheme.

If you’re feeling crafty, create a feature wall with shelves or hanging plants. Display your favorite toiletries, candles, and decorations on open shelves to add a personal touch to your space. Or, bring the outdoors in with hanging plants that add a touch of greenery and life to your bathroom.

Lastly, don’t forget about the small details. Update your soap dispensers, toothbrush holders, and wastebaskets to match your new color scheme or theme. These finishing touches will tie your refreshed bathroom together and truly make it feel like new.

So, there you have it – seven DIY ideas to refresh your bathroom this weekend. With these simple yet effective projects, you can easily create a relaxing and stylish space that you’ll enjoy for years to come. Happy refreshing!

Home Maintenance Calendar: What to Do and When

As a homeowner, it’s important to stay on top of maintenance tasks to keep your space in tip-top shape and ensure your investment lasts for the long haul. Think of your home as a living, breathing entity that needs regular care and attention – and, just like us, different aspects of our homes require unique check-ins at different times of the year. To help you stay organized, create a home maintenance calendar to keep track of tasks and break down the overwhelm that can come with homeownership.

So, where to begin? Let’s break it down season by season, with must-do tasks to tackle and some you can outsource if your budget allows.

**Spring:**

After the cold winter months, spring is the perfect time to give your home a refresh, inside and out. Start by deep cleaning your space, opening windows to let in fresh air, and giving your home a top-to-bottom scrub. It’s also a great time to tend to your yard, with gardening tasks like weeding, planting, and mowing taking center stage. For your home’s maintenance, now is the time to inspect and repair your roof, gutters, and downspouts after the winter thaw, ensuring they’re ready for the coming spring rains.

**Summer:**

With warmer weather comes a focus on outdoor living spaces and your home’s exterior. Summer is the time to power wash and repaint exterior surfaces, clean and repair decks or patios, and ensure your outdoor living areas are safe and comfortable. It’s also a good idea to service your air conditioning unit to keep it running efficiently during the hot summer months. If you didn’t get to it in the spring, you can also tend to any remaining gardening tasks, like pruning trees and shrubs.

**Autumn:**

As the leaves turn and the weather cools, it’s time to focus on preparing your home for the coming winter. This includes tasks like cleaning the chimney and fireplaces, ensuring they’re safe to use during the colder months. You’ll also want to winterize your outdoor faucets and irrigation systems, and if you have a pool, now is the time to close it for the season. Don’t forget to clean your gutters again, as they’ll be full of autumn leaves, and inspect your roof for any damage that may have occurred during summer storms.

**Winter:**

The colder months are a great time to focus on indoor maintenance tasks. Test and replace batteries in smoke and carbon monoxide detectors, and ensure your fire extinguishers are in working order. It’s also a good time to give your interiors a fresh coat of paint and tend to any needed repairs, like fixing creaky doors or dripping faucets. If you’re feeling crafty, you can also take on some indoor improvement projects, like building new shelves or updating your backsplash.

Now you have a year-round guide to home maintenance, helping you stay organized and on top of tasks to keep your space in great shape!

DIY Storage Solutions: Organize Your Home on a Budget

The idea of organizing your entire home can be daunting, especially if you’re on a tight budget. Luckily, there are plenty of DIY storage solutions that can help you create a functional and aesthetically pleasing space without breaking the bank. With a few simple tools and a bit of creativity, you can transform your home into a well-organized haven.

One of the easiest and most affordable ways to add storage is to utilize baskets and bins. These can be placed on shelves or under beds to store items such as linens, clothing, or children’s toys. Labeling the bins can make it easier to find what you’re looking for and keep your space organized. You can also install shelves at varying heights to accommodate different sized baskets and create a visually appealing display.

Another budget-friendly idea is to repurpose furniture you already own. For example, an old dresser can be repainted and used to store crafts or office supplies. You can also add shelves or baskets to the inside of closet doors to utilize that space more efficiently. Additionally, installing hooks on the back of doors or walls can provide extra storage for coats, bags, or keys.

If you’re handy with a drill, creating your own custom storage solutions can be a fun and inexpensive project. You can build your own shelves or hanging organizers using inexpensive materials from your local hardware store. For a more rustic look, consider using reclaimed wood or upcycling old crates or wine boxes to create unique storage options.

Dollar stores and thrift shops are also great places to find affordable storage solutions. You can often find baskets, containers, and other organizing tools at a fraction of the cost of regular retail stores. With a little creativity and resourcefulness, you can organize your home without spending a fortune.

When creating your own storage solutions, don’t be afraid to think outside the box. For example, instead of purchasing a traditional bookcase, you could hang a series of floating shelves at varying heights to create an eye-catching display for your books and accessories. Clear containers or labeled jars can also be used to store dry goods in your pantry or small items in your bathroom, making it easy to find what you need at a glance.

Organizing your home on a budget is all about creativity and resourcefulness. Don’t be afraid to experiment with different ideas and think beyond the traditional storage solutions. With a bit of effort and imagination, you can create a functional and stylish space that meets your unique needs. Remember, organizing your home should be a fun and satisfying journey!

I hope these tips inspire you to create your own DIY storage solutions and transform your space into a well-organized haven. Happy organizing!

Create Your Dream Garden: A Step-by-Step Guide

Gardening is a beloved hobby for many, offering a rewarding way to connect with nature and create a beautiful outdoor space. Designing your dream garden may seem daunting, but with careful planning and a step-by-step approach, you can bring your vision to life.

**Define Your Garden’s Purpose**

Start by considering the purpose of your garden. Do you want a tranquil space for relaxation and entertainment, a vibrant showcase for rare plants, or a productive kitchen garden brimming with fresh produce? Defining your garden’s purpose will guide your design choices and help you create a space that aligns with your unique needs and interests.

**Survey Your Site**

Take time to observe and understand your outdoor space. Note the sun’s path throughout the day to identify sunny and shaded areas, and consider the soil type and existing landscape features, such as trees, slopes, and water sources. These elements will influence your plant choices and the overall layout of your garden.

**Draw a Plan**

Creating a scale drawing of your garden will help you visualize your design and make informed decisions. Mark the position of existing features and plot potential new elements, considering the mature size of plants to ensure they have room to thrive. This plan will be your roadmap, guiding plant selection, hardscaping choices, and future expansions.

**Select Your Plants**

Choosing plants is one of the most exciting parts of the process. Consider the conditions of your site, selecting plants that will thrive in the specific light, soil, and moisture levels of your garden. Choose a mix of annuals and perennials for continuous color, and don’t forget to include plants that attract beneficial insects and support wildlife.

**Incorporate Hardscaping**

Hardscaping elements like pathways, patios, and garden walls provide structure and define different areas of your garden. They can also reduce maintenance by preventing foot traffic from trampling delicate plants. Choose materials that complement your home’s architecture and the overall style of your landscape.

**Implement Your Design**

With your plan in hand, it’s time to bring your dream garden to life. Prepare the soil, incorporate compost or other amendments as needed, and start planting according to your design. Pay attention to plant spacing and watering requirements to give your garden the best start possible.

**Maintain and Evolve Your Garden**

Gardening is an ongoing journey. Regular maintenance, such as weeding, watering, and deadheading, will keep your garden looking its best. As your garden matures, you can divide and relocate plants, introduce new varieties, and experiment with different design elements, allowing your garden to evolve and bring you joy for years to come.

Quick Fixes for Drafty Windows and Doors

As the cold weather sets in, many of us will start to feel those familiar drafts sneaking in around windows and doors. While replacing these features can be costly and time-consuming, there are quick and easy fixes that can significantly reduce those chilly intrusions.

One simple solution is to invest in some weatherstripping. This inexpensive fix involves applying a strip of material, such as foam or vinyl, to the edges of your windows and doors to create a tight seal when they are closed. It’s an easy DIY project that can make a big difference in your home’s comfort and energy efficiency. Another option is to use caulk or sealant to fill any gaps or cracks around your window and door frames. This is a great way to block out those sneaky drafts and keep the warm air inside where you need it.

For windows, you can also try using plastic film insulation kits, which create an extra barrier of protection. These kits are inexpensive and easy to install, and they can be found at most hardware stores. The film is applied to the indoor window frame and then heated with a hairdryer to shrink it tight, creating an additional layer of insulation that helps keep the cold out and the warmth in.

Drafty doors can also be remedied with a simple door sweep or threshold seal. A door sweep is a small piece of hardware that attaches to the bottom of your door, creating a seal between the door and the threshold when closed. A threshold seal, on the other hand, is adhered to the threshold of your door, forming a tight barrier against drafts. Both are easy and affordable solutions that can make a significant impact on your home’s comfort.

Another quick fix for drafty windows is to check the locks and latches. Ensuring these are secure and tight can help reduce air leakage and improve the overall energy efficiency of your home. It’s also a good idea to lubricate the hinges and tracks of your windows and doors to ensure they close properly and form a tight seal. This can be done with a simple household lubricant or silicone spray.

In addition to these quick fixes, it’s important to regularly maintain your windows and doors. This includes cleaning the tracks and frames, as well as checking for any damage or wear and tear that may need repair or replacement. Taking the time to do this can help ensure that your windows and doors are functioning properly and providing the best possible seal against the elements.

By implementing these simple and inexpensive fixes, you can effectively reduce drafts and improve the comfort and energy efficiency of your home. So, before you resort to costly replacements, give these quick solutions a try and keep those chilly drafts at bay!